Nov 9, 2023 | Uncategorized
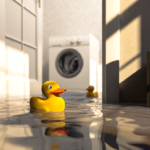
Sewage backups can turn your basement into a nightmare. Raw sewage flooding into your living space brings health risks and extensive damage. Understanding what causes these backups is the first step toward prevention. This article explores the common causes of basement sewage backups and provides tips to safeguard your home.
What Causes Sewage Backups?
Several issues can lead to sewage pushing back through drains and toilets into your basement. The most frequent causes include:
Blockages
Blockages in drainage pipes are a prime culprit behind sewage backups. Debris like hair, grease, and tree roots can narrow pipes over time, eventually plugging them fully. Toilets clogged by wipes, feminine products or other items sent sewage backwards when flushed. Even minor drain clogs can cause backups if located in critical positions. Blockages force sewage to take alternative routes, often into your basement.
Line Breaks
Cracks and breaks in drainage pipes also enable sewage backups. Older pipes made from clay or steel are prone to cracking as they rust and settle. Tree roots infiltrate tiny cracks, widening them as the roots grow. Loose joints between pipes disconnect under pressure. Any breach or break in your home’s plumbing network can provide an opening for sewage to flood your basement during heavy usage.
Overloaded Sewer Lines
Municipal sewer lines get overloaded during intense rainstorms. Large volumes of stormwater and wastewater fill sewer pipes past capacity. The overloaded system pressurizes, pushing sewage backwards into basements through drains and toilets.
Sump Pump Failures
Sump pumps remove groundwater from around your foundation, preventing flooding. But when sump pumps fail due to power outages or mechanical issues, water accumulates and saturates the soil. Liquids follow the path of least resistance – if your floor drain lacks a backflow valve, sewage can flow backwards from overloaded sewers into your basement.
Improper Drainage
Incorrect drainage grading around your home’s foundation funnels groundwater toward your basement walls instead of away from your house. This amplifies wetness against the foundation. Improper drainage, combined with sump pump problems, drastically raises your sewage backup risk whenever the sewer system overflows.
Septic System Issues
Homes on septic systems also face sewage backup risk. When septic tanks are overfull or drainage fields become saturated, sewage can back up through drains into the basement. Insufficient tank pumping and poor septic maintenance heighten your vulnerability.
How to Prevent Sewage Backups
While you can’t eliminate the risk, proactive maintenance significantly reduces the likelihood of basement sewage backups. Key prevention strategies include:
Regular Drain Inspections
Inspect sinks, showers, and floor drains regularly for proper drainage. Pour water into rarely used drains monthly to keep water in the traps. Watch for slow drainage, gurgling noises, or foul smells—signs of possible blockages. Inspect pipes for damage and leaks. Catching issues early better prevents backups.
Drain Maintenance
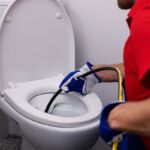
Routinely clean drains and pipes to remove built-up gunk. Use a drain snake monthly to clear debris and keep water flowing freely. Consider professional hydro jetting services annually to scour interior pipe walls. Proactive maintenance removes blockage risks before they escalate into backups.
Clog-Free Plumbing Habits
Never pour fats, oils or grease down sinks – these coat pipes and attract other debris. Install sink strainers to catch food particles. Throw wipe products and feminine items in the trash, not the toilet. Avoid using harsh drain cleaners or caustic products, which can damage pipes. Making minor plumbing habit adjustments reduces potential clogs.
Rooter Services
Tree roots often infiltrate and break pipes, seeking water sources. If trees grow near your home, consider professional rooter services. Root cutting, foaming, or barriers can protect pipes from damage and blockages. Removing roots also avoids foundation destruction, so it’s a home protection twofer.
Backflow Valves
Plumbing code in many areas now requires backflow valves on basement floor drains. These simple devices allow wastewater out while blocking sewage backflow during floods or sewer overflows. Consider adding backflow valves if not present – installation expenses pale compared to sewage cleanup costs.
Sump Pump Upgrades
Upgrade to heavy-duty sump pumps with backup power capabilities. Test the systems monthly and service them annually. Waterproofing basement walls and improving perimeter drainage keeps groundwater from accumulating around your foundation. Keeping basements drier avoids saturation, enabling sewage to penetrate through floor drains.
Professional Drain Inspections
Periodically hire professional drain inspection services using camera technology to assess pipe condition. Technicians can detect lurking issues like root infiltrations, fractures and deteriorating joints early before they cause problems. Repairs are cheaper when not in an emergency, reducing risk.
Grading Improvements
Ensuring proper drainage slopes away from your home is crucial but commonly overlooked. Add grading if lacking or re-grade improperly sloped areas. Water should flow away from your foundation at a minimum 1″ drop over a 5′ run. Good drainage transporting groundwater from your basement walls drastically reduces sewage backup frequency.
Septic System Care
Homeowners with septic systems should strictly follow maintenance guidelines to prevent malfunctions. Inspections every three years ensure proper operation. Pumping the tank as recommended (generally every 3-5 years) avoids overflows. Poor maintenance will inevitably lead to backups of sewage from your own system.
Protect Your Home: Prevent Sewage Backups with Tap Tech
Being proactive reduces the chances of experiencing the nightmare of a sewage backup. Following drain care best practices keeps your plumbing system in peak shape. At the first sign of slow drains, strange noises, or sewage smells, contact a professional like the experts at Tap Tech for prompt inspection. Taking quick action when issues arise protects your basement and home from destructive damage.
Call us anytime at 343-305-1172 for 24/7 expert plumbing service.
Nov 9, 2023 | Uncategorized
Heavy rains can reveal leaks in your home’s foundation and lead to water seeping into the basement. Left unchecked, this water infiltration can cause extensive damage from flooding, mold growth, foundation issues, and even collapse. It’s crucial to act quickly to find and repair any sources of basement leaks.
In this comprehensive guide, we will cover:
- The most common causes of basement leaks during heavy rains
- How to thoroughly inspect your basement for signs of moisture or water damage
- Tips for locating specific points where water is entering the basement
- Steps for repairing basement wall and floor leaks
- Preventing leaks from basement plumbing fixtures like sump pumps or water heaters
- Upgrading your basement with flooding prevention systems
- Creating proper drainage and grading around your home
- Long-term waterproofing solutions for your foundation
Read on to learn everything you need to dry your basement after major storms.
Causes of Basement Leaks
Heavy rainfall and flooding can overload a home’s drainage systems and foundation walls, allowing water to seep into basements through cracks and openings.
The most common causes of basement flooding are gaps or cracks in the poured concrete or cinder block foundation walls. As mortar deteriorates between bricks or stones over time, it creates additional gaps for water intrusion. Loose wall ties can cause walls to bow inward, opening up cracks. Even small cracks or openings allow water to follow the path of least resistance downward.
Insufficient or improper exterior waterproofing materials also lead to leakage. Tree roots penetrating the foundation, poor exterior grading causing runoff toward the house, and lack of downspout extensions to divert roof runoff are other potential causes of flooding.
Clogged downspouts, gutters and drainage pipes create backups that send water toward the foundation. In some cases, a high local water table can flood upward into the basement through floors and walls. Window well flooding frequently seeps into window frames and walls during heavy rains.
Basement Plumbing Leaks
In addition to foundation seepage, basement plumbing fixtures are prone to leaks, especially if pipes or appliances are older. Potential problem areas include:
In addition to foundation seepage, basement plumbing fixtures are prone to leaking, especially in older homes. Water heater supply lines or tanks can burst or leak over time. Shutoff valves, supply pipes and drain traps under sinks and laundry tubs often start leaking.
Washing machine water supply lines are another common source as hoses age and connections loosen. Any kinks, cracks or loose fittings in water supply plumbing can develop into leaks. Toilets are also problematic with cracked tanks or bowls, loose bowl connections, and deteriorating wax ring seals.
As heavy rains overload home drainage, sump pumps may be unable to keep up, resulting in backups and flooding. Sewage ejector pumps can also fail or have clogged discharge lines that lead to flooding. Finally, clogged basement floor drains can create standing water backups.
Finding & Diagnosing Basement Leaks
Finding the exact location where water enters your basement is the first step toward solving basement flooding issues. Here are some tips for leak detection:
Begin by thoroughly inspecting your basement interior after heavy rains or sudden snow melts, resulting in standing water. Check for:
- Damp spots or water stains on walls, floors, or ceilings
- Puddles or droplets of water on the floor
- Darkened or warped wood on walls or floor joists
- Bubbling or warped paint, drywall, or flooring materials
- Efflorescence—a white powdery mineral deposit left behind as moisture evaporates
- Mold or mildew growth on walls, wood, or carpets
- A damp, musty odour
Isolate Affected Areas
Note any areas with moisture or leaks to isolate the section of the basement involved. This will narrow down where external water is coming from or which interior plumbing fixture could be leaking.
Inspect Exterior Foundation
Go outside and inspect your home’s entire foundation perimeter. Look closely for:
- Cracks wider than 1/4 inch
- Crumbling, missing, or deteriorating mortar
- Signs of water flow like dirt washing away
- Water droplets or damp concrete after rains
- White efflorescence deposits on exterior walls
- Moss or algae growth indicating chronic moisture
- Misaligned downspouts directing water toward the house
- Use a hose to simulate rainfall and observe if any sections leak.
Check Interior Plumbing
Thoroughly inspect basement plumbing lines and fixtures for moisture, rust, mineral deposits, or other signs of leaks:
- Examine water heater for rust and leaks at fittings, valves, or connections
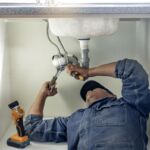
- Inspect supply lines, drain pipes, and trap assemblies under sinks
- Check for toilet tank cracks and loose bowl connections
- Test sump pump operation and look for backup evidence
- Ensure floor drains and ejector pumps are clear of debris
- Assess washing machine hoses and valves
Professional Leak Assessment
For difficult-to-trace leaks or seepage, a licensed plumber has specialized tools to accurately identify problem areas:
- Moisture meters detect elevated moisture levels in walls or floors.
- Thermal imaging cameras detect temperature differences caused by moisture.
- Floodlights illuminate basement walls to expose cracks.
- Dye testing introduces coloured dye into plumbing to trace leaks.
- Pipe inspection cameras locate cracks or obstructions underground.
Repairing Basement Leaks
Once the sources of basement flooding have been identified, repairs can begin. The best repair method depends on the type and extent of damage:
Minor Foundation Cracks & Holes
For small cracks up to 1/4 inch wide in poured concrete or cinder block foundations, use a concrete crack sealant caulk labelled for basement foundations and masonry repair. Look for flexible polyurethane or epoxy-based sealants that won’t crack over time. Hydraulic cement products are also suitable for minor basement wall repairs.
Follow these steps:
- Using a wire brush, clean out any loose debris and dirt from the crack.
- Apply concrete sealer or patching compound according to product directions.
- Patch larger gaps or holes with hydraulic cement, working it firmly into the crevice.
- Allow full curing times before exposing repaired areas to moisture.
- Check exterior drainage to prevent water from pooling near basement walls.
- Major Foundation Cracks or Wall Damage
Severe Foundation Cracks & Holes
A professional foundation repair contractor is recommended for more severe foundation cracks wider than 1/4 inch, vertical cracks, wall sections moving inward, or severe spalling and crumbling. They have the specialized equipment and materials to provide structural repairs:
Carbon Fibre Reinforcement Strips:
Fibre-reinforced polymer (FRP) strips are applied over cracks with epoxy to bond concrete together. This structurally reinforces the wall and effectively repairs cracks up to 1 inch wide.
Wall Anchors:
Steel anchors are embedded within foundation walls using epoxy or concrete. The anchors are attached to adjustable steel brackets on the interior to push bowing walls back into the proper position.
Concrete Wall Patching:
Large holes and severely deteriorated areas of the foundation can be patched by injecting polyurethane foam behind the rebar, followed by applying a cementitious resurfacing compound.
Full Wall Replacement:
In cases of extreme damage, sections of foundation walls may need complete replacement. This requires stabilizing the structure, excavating to access the damaged section building forms, and pouring new reinforced concrete in lifts.
Waterproof Coatings & Membranes
In basements with chronic seepage through porous concrete or excessive humidity, waterproof coatings and membranes provide an extra moisture barrier:
Cementitious Coatings like Thoroseal® contain cement fillers and polymers that seal concrete pores against moisture penetration, both inward and outward. Two to three coats are applied with a brush or sprayer.
Bituminous Coatings and asphalt emulsions also repel water but may have strong odours during application that can linger afterward. Proper ventilation is needed.
Elastomeric Membranes like rubberized asphalt are rolled onto foundation walls to create a thick, flexible, waterproof barrier. These systems drain water down to perforated pipes at the base of walls.
Exterior Waterproofing Membranes can be applied to the outside of the foundation walls before backfilling. These adhesive sheets prevent moisture from contacting the foundation.
Fixing Basement Floors
In addition to walls, basement floors are susceptible to moisture damage and must be repaired and protected:
- Remove any water-logged carpeting, underlayment, wooden subflooring, and floor trim to expose the bare concrete floor. Allow floors to dry thoroughly.
- Repair cracks and deterioration in the concrete surface with hydraulic cement filler and resurfacing products.
- Etch and clean bare concrete floors before applying waterproofing sealant.
- Use an epoxy-based concrete floor sealant to waterproof floors against moisture penetration from underneath.
- Install an interior perimeter French drain and sump pump system to collect and remove seepage.
- Replace flooring only after concrete repairs and sealants have been applied and the floor is completely dry.
Ontario’s Trusted Plumbing Experts
Preventing and addressing plumbing issues requires diligent inspection, leak detection, and proper repairs. At Tap Tech, our licensed plumbers have over 25 years of experience diagnosing and resolving residential and commercial plumbing problems.
- 24/7 emergency services
- Scheduled appointments
- Professional plumbing services include drain cleaning, sewer repair, sump pump replacement, and leaky pipes.
Contact a certified plumber today from Tap Tech! Book Here or call 343-305-1172 for 5-star plumbing services and solutions.

Oct 11, 2023 | Uncategorized
The warm weather of summer calls for relaxation, backyard gatherings, and time with friends and family. But you can only enjoy the season if your home’s plumbing system is prepared for the increased use and potential strains of summer. Take the time now to inspect, test, and maintain all aspects of your plumbing to avoid headaches later. This prepares your system for visitors and prevents costly repairs during the peak of summertime fun.
Inspect Hoses, Valves, and Washing Machine
Start by examining all outdoor and indoor hoses. Look for cracks, leaks, and loose connections. Tighten any loose fittings with pliers. Turn water on and off at each hose bib and sprayer to test for leaks. Also inspect laundry room hoses and valves. Run the washing machine through a short cycle while watching for drips or leaks. Catching leaks now prevents damage later.
In addition, turn all water supply valves on and off. This ensures they operate properly and don’t get stuck open later. Check for drips or weepage that indicates a faulty valve. Replacing valves now is quicker than an emergency replacement when one fails.
Service the Hot Water Heater
Most homeowners do not think about their hot water heater in the summer months but this is actually the best time to drain and inspect the heater because there is no risk of freezing. If you find that your water heater is in need of a repair or a replacement, you will not have to deal with competition if you book an appointment in the summer because a plumber’s schedule will be more flexible when it is warm out. Once winter arrives, it will be a lot harder to book an appointment because this is the busiest season for hot water heaters.
Monitor Water Pressure
Before leaving for vacation, check water pressure at several faucets. Install a pressure gauge if needed. Pressure can build up in stagnant systems while you’re away. Consider adding a pressure regulator to protect pipes and prevent leaks.
Also, turn faucets on and off before your vacation. This ensures shut-off valves work properly. A plumber can then repair any issues before you leave rather than dealing with floods upon returning.
Maintain Outdoor Faucets and Irrigation
Examine all exterior hose bibs and faucets. Look for rust, drips, and difficulty opening or closing. Replace any deteriorated bibs now to maintain access to outdoor water. Also inspect irrigation system valves and backflow preventers. Consult a plumber for any necessary irrigation maintenance or repairs.
Provide your guests with friendly reminders
Visitors may flush items that don’t belong in the toilet and this can lead to plumbing emergencies. Don’t be shy and remind your guests not to flush cotton swabs or paper towels because these items belong in the trash. This reminder is especially important if your home is the popular place to hang out and this piece of information can help prevent clogs and stoppages.
Test the Sump Pump
Heavy rainstorms can overwhelm sump pumps if not properly maintained. To prepare, test your pump by simulating a downpour. Clear any debris around the intake. Listen for proper operation without excessive run times. Consider upgrading your pump or adding battery backup if necessary. Investing in a quality pump prevents flooded basements and water damage.
Maintain Garbage Disposal Use
Summer produce can wreak havoc on disposals. Avoid jams by keeping fruit pits, corn husks, and other fibrous waste out of the disposal. Place a small garbage can near the sink to properly dispose of these items. Inform guests how to properly use the disposal. Preventive measures now save you from disassembly and repairs later. Proper use keeps food waste flowing properly.
To Summarize
Taking preventive maintenance steps now avoids plumbing emergencies later, allowing you to relax and enjoy the summer season without disruptive and costly plumbing repairs. A few hours inspecting and maintaining your plumbing system gives you peace of mind that your home’s pipes and fixtures are ready for summertime fun. Being proactive saves money and lets your summer be filled with joy rather than plumbing headaches. Prep your plumbing so you can make the most of sunny days with family and friends.
Keep Your Plumbing System Ready at All Times!
Do you want to make sure your plumbing system is always ready? Tap tech has you covered!
For over 25 years, Tap Tech has provided Southeastern Ontario with premier drain cleaning, leak detection, pump replacement, and all other residential and commercial plumbing services. Our licensed, highly-trained plumbers have the experience, equipment, and expertise to address any plumbing challenge quickly and efficiently.
We offer 24/7 availability for plumbing emergencies so you’re never left without support. We provide upfront pricing so you aren’t surprised by hidden fees. Our prompt response times allow us to solve problems before major damage occurs. We offer superior hydro jetting and sewer video camera inspection services for the best results.
Contact Tap Tech today to schedule premier plumbing services for your home or business.

